How To Make Html Page


Learn HTML Using Notepad or TextEdit

Web pages can be created and modified by using professional HTML editors.

However, for learning HTML we recommend a simple text editor like Notepad (PC) or TextEdit (Mac).

We believe in that using a simple text editor is a good way to learn HTML.

Follow the steps below to create your first web page with Notepad or TextEdit.

Step 1: Open Notepad (PC)

Windows 8 or later:

Open the Start Screen (the window symbol at the bottom left on your screen). Type Notepad.

Windows 7 or earlier:

Open Start > Programs > Accessories > Notepad

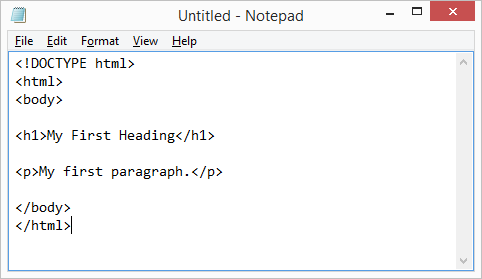
Step 2: Write Some HTML

<!DOCTYPE html>
<html>
<body>

<h1>your heading</h1>

<p>your paragraph here</p>

</body>
</html>
Notepad


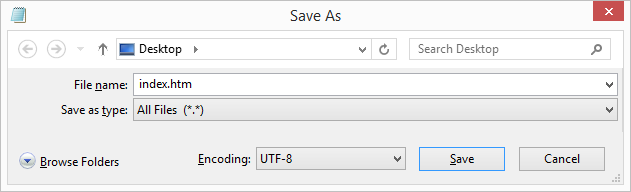
Step 3: Save the HTML Page

Save the file on your computer. Select File > Save as in the Notepad menu.

Name the file "index.htm" and set the encoding to UTF-8 (which is the preferred encoding for HTML files).

View in Browser

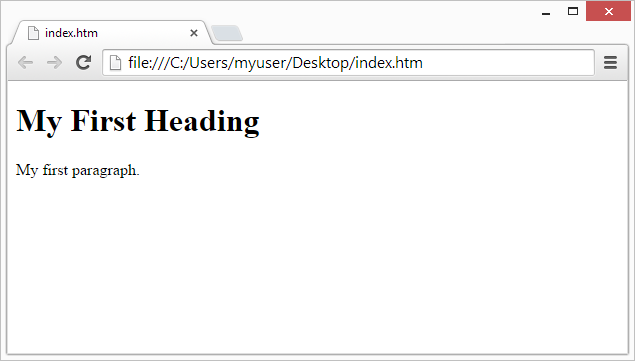
Step 4: View the HTML Page in Your Browser


Open the saved HTML file in your favorite browser (double click on the file, or right-click - and choose "Open with").

The result will look much like this:

View in Browser

like this you can edit and make html page 

Read More

Search This Blog

HTML Attributes

  HTML Attributes All HTML elements can have  attributes Attributes provide  additional information  about elements Attributes are always specified in  the start tag Attributes usually come in name/value pairs like:  name="value" The href Attribute The  <a>  tag defines a hyperlink. The  href  attribute specifies the URL of the page the link goes to: < a  href ="https://www.shop.com" >visit our shop < /a > <!DOCTYPE html> <html> <body> <h2>The href Attribute</h2> <p>HTML links are defined with the a tag. The link address is specified in the href attribute:</p> <a href="https://mundherohan.blogspot.com/">Visit My Website</a> </body> </html>   The src Attribute The  <img>  tag is used to embed an image in an HTML page. The  src  attribute specifies the path to the image to be displayed: <!DOCTYPE html> <html> <body> <h2>The src Attribute</h2&g

Elements of the html

  HTML Elements The HTML  element  is everything from the start tag to the end tag: < tagname > Content goes here... < /tagname > Examples of some HTML elements: < h1 > My First Heading < /h1 > < p > My first paragraph. < /p > Nested HTML Elements HTML elements can be nested (this means that elements can contain other elements). All HTML documents consist of nested HTML elements. The following example contains four HTML elements ( <html> ,  <body> ,  <h1>  and  <p> ): <html> <body> <h1>My First Heading</h1> <p>My first paragraph.</p> </body> </html>   The   <body>   element defines the document's body. It has a start tag  <body>  and an end tag  </body> . Then, inside the  <body>  element there are two other elements:  <h1>  and  <p> : < h1 > My First Heading < /h1 > < p > My first paragraph. < /p > The  <h1>  

HTML Headings

  HTML Headings EX. Heading 1 Heading 2 Heading 3 Heading 4 Heading 5 Heading 6 HTML Headings HTML headings are defined with the  <h1>  to  <h6>  tags. <h1>  defines the most important heading.  <h6>  defines the least important heading. <!DOCTYPE html> <html> <body> <h1>Heading 1</h1> <h2>Heading 2</h2> <h3>Heading 3</h3> <h4>Heading 4</h4> <h5>Heading 5</h5> <h6>Heading 6</h6> </body> </html> Headings Are Important Search engines use the headings to index the structure and content of your web pages. Users often skim a page by its headings. It is important to use headings to show the document structure. <h1>  headings should be used for main headings, followed by  <h2>  headings, then the less important  <h3> , and so on. Bigger Headings Each HTML heading has a default size. However, you can specify the size for any heading with the  style  at